10 Budget-Friendly Home Improvement Projects You Can Do This Weekend

Why Weekend Home Improvement Projects Are Worth Your Time
If you’re looking to enhance your home’s appearance without spending thousands, weekend home improvement projects are your best bet. These small-scale, low-cost tasks can refresh your space, add functionality, and increase property value—all without hiring a professional.
Benefits of Short-Term DIY Projects
- Instant gratification: You see the results within 1–2 days.
- Cost-effective: Avoid high contractor fees.
- Customizable: Tailor the improvements to your personal style.
- Skill-building: Learn new handy skills that benefit future projects.
How to Budget and Plan Efficiently
Start with a clear list. Identify the areas in your home that need attention, set a realistic budget (under $100 for most tasks), and research step-by-step instructions online. Always check for sales at local hardware stores before starting.
See also: PartnersDecoratorAdvice .com: Transform Your Home Decor with Fun Tips and Expert Insights
Essential Tools and Supplies for Weekend DIY Projects
Before diving in, make sure you’re stocked with basic tools. Having the right gear will make your work smoother and more enjoyable.
Basic Tools Every Homeowner Should Own
- Screwdriver set
- Hammer
- Tape measure
- Level
- Utility knife
- Drill and bits
- Safety goggles and gloves
Budget Shopping Tips for DIY Supplies
- Use coupons from big-box stores.
- Shop clearance aisles or online deals.
- Check local community groups for free or discounted tools.
Top 10 Budget-Friendly Home Improvement Projects
Let’s dive into the best easy and affordable upgrades you can complete in just a weekend!
1. Refresh Your Walls with Paint or Peel-and-Stick Wallpaper
Painting walls can entirely change a room’s vibe. Whether it’s an accent wall or an entire space, this is a low-cost, high-impact project.
Step-by-Step Guide to Painting
- Prep the area: Move furniture, tape edges.
- Clean the walls: Remove dust and dirt.
- Apply primer if needed.
- Roll on your chosen color and let dry.
Where to Use Peel-and-Stick Wallpaper
Peel-and-stick wallpaper is great for:
- Entryways
- Accent walls in living rooms
- Kids’ rooms or play areas
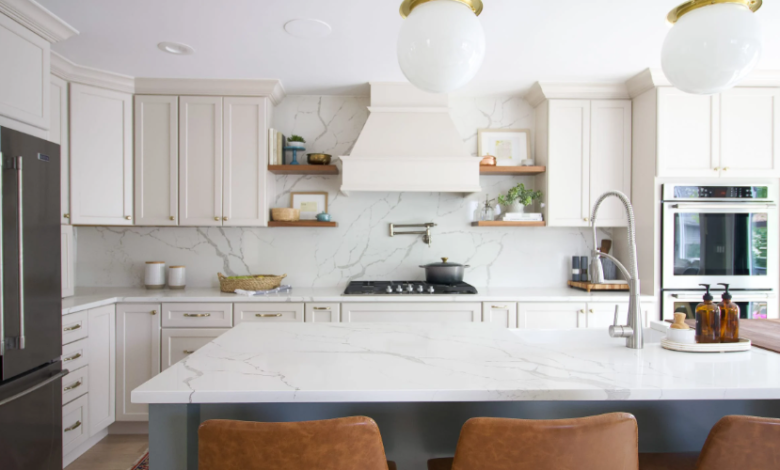
2. Update Cabinet Hardware in Kitchen and Bathroom
Swapping out dated knobs or pulls for modern ones can give your cabinetry a sleek, updated look.
Choosing Affordable, Stylish Hardware
Look for brushed nickel, matte black, or antique bronze options at discount stores or online for under $2 per piece.
Tools Needed and Installation Tips
All you need is a screwdriver and possibly a measuring tape for alignment.
3. Install New Light Fixtures or LED Bulbs
Old light fixtures can make a home feel dated. Replace them with modern, efficient options.
Energy-Saving Benefits
Switching to LED can lower your energy bills and reduce heat in the room.
Easy Fixture Replacement Steps
- Turn off the power.
- Remove the old fixture.
- Connect new fixture wires.
- Secure and test it.
4. Add a Backsplash in Kitchen Using Peel-and-Stick Tiles
Peel-and-stick backsplashes are ideal for renters and homeowners alike.
Cost-Effective Materials
Self-adhesive vinyl or gel tiles cost around $10–$20 per sheet.
Simple Installation Process
Measure the area, cut tiles to fit, and stick them in place. No grout needed!
5. Create a Gallery Wall or Wall Art Display
Transform a blank wall into a personalized space.
Affordable Print and Frame Options
Use free printables, thrift store frames, or DIY wood frames.
How to Arrange and Hang Art Properly
- Start from the center and work out.
- Use a level and tape measure.
- Lay out the arrangement on the floor before hanging.
6. Revamp Entryway with a New Rug and Hooks
Your entry sets the tone for your entire home.
Budget Entryway Makeover Tips
Add:
- A colorful rug ($20 or less)
- Wall hooks for keys/bags
- A small mirror or shelf
Declutter and Organize Small Spaces
Maximize vertical space and keep shoes or coats in baskets or behind-the-door racks.
7. Install Floating Shelves for Storage and Decor
Floating shelves are decorative and practical.
Choosing the Right Wall and Mounting Technique
- Drywall anchors may be needed.
- Use a level for even placement.
Decorative Styling Ideas
Mix books, small plants, candles, and photo frames for a balanced look.
8. Replace Old Faucets in Kitchen or Bathroom
Modern faucets are easier to use and save water.
Tools Required and Installation Guide
- Wrench
- Plumber’s tape
- Screwdriver
Follow the manufacturer’s instructions to swap the old faucet.
Best Budget Faucet Brands
Look for deals on Moen, Delta, and Glacier Bay.
9. Refresh Grout and Caulking in Bathroom
Dirty grout can make your bathroom feel unclean.
Why This Matters for Cleanliness
Fresh caulking prevents mold and extends the life of fixtures.
How to Re-grout or Re-caulk Easily
- Remove old material with a scraper.
- Apply new caulk or grout using a smoothing tool.
- Let it cure for 24 hours.
10. Upgrade Switch Plates and Outlet Covers
Small details make a big difference in design.
Matching with Room Themes
Choose covers in metal, wood, or painted finishes to match decor.
Quick DIY Installation Steps
- Unscrew the old cover.
- Replace with new.
- Screw it in place.
Safety Tips for DIY Home Improvement Projects
Common Mistakes to Avoid
- Skipping prep work
- Not using a level
- Ignoring electrical safety
Basic Safety Gear and Precautions
- Always wear gloves and goggles
- Turn off power when dealing with wires
- Use a sturdy ladder or step stool
Estimated Costs and Time for Each Project
| Project | Estimated Cost | Estimated Time |
|---|---|---|
| Painting Walls | $30–$70 | 4–6 hours |
| Cabinet Hardware | $20–$50 | 2 hours |
| Light Fixtures | $30–$100 | 2 hours |
| Peel-and-Stick Backsplash | $40–$80 | 3–4 hours |
| Gallery Wall | $20–$60 | 2–3 hours |
| Entryway Revamp | $25–$50 | 2 hours |
| Floating Shelves | $30–$70 | 3 hours |
| New Faucets | $40–$100 | 2–3 hours |
| Grout/Caulk | $15–$30 | 2 hours |
| Switch Plates | $10–$25 | 1 hour |
When to Call a Professional
While these are all beginner-friendly projects, sometimes it’s best to bring in a pro.
Signs Your DIY Project Needs Expert Help
- Electrical work beyond bulb changes
- Plumbing requiring pipe modifications
- Structural changes or wall removals
FAQs: Budget-Friendly Home Improvements
Q1. What is the cheapest home improvement project with the biggest impact?
Painting a room offers the most noticeable change for the lowest cost.
Q2. Can I do home improvements even if I rent?
Yes! Use temporary options like peel-and-stick tiles or wall decals.
Q3. How can I make my home look modern on a budget?
Focus on lighting, wall color, and small upgrades like handles or rugs.
Q4. Are DIY improvements tax deductible?
Generally no, unless it’s part of a home office or energy-efficient upgrade.
Q5. What’s the best project to start with?
Start with switching out cabinet hardware—it’s fast and motivating.
Q6. Where can I find free DIY guides?
Websites like Family Handyman and YouTube offer plenty of tutorials.
Conclusion: Transform Your Space Without Breaking the Bank
You don’t need a huge budget or a contractor to breathe new life into your home. With these 10 budget-friendly home improvement projects you can do this weekend, your space can be transformed into something fresh, functional, and stylish. Set aside a Saturday or Sunday, gather your tools, and start creating the home you’ve always wanted—one simple project at a time.


